Camping Lights Explained: Lumens, Runtime and Not Blinding Your Neighbours
A camping light has two jobs to get right: helping you see what you are doing, and putting that light where you need it. A large number on the box does not answer both questions. Before choosing a headtorch, handheld torch or lantern, it helps to separate light output, beam distance and runtime—and then think about the task on your pitch.
This guide uses manufacturers’ own explanations and product features, alongside DarkSky’s responsible-lighting principles. The named lights are examples of different designs, not recommendations or the results of a CampGear product test.
In a nutshell
- Read lumens, beam distance and runtime as separate specifications. Check the setting and battery configuration attached to each figure.
- A runtime figure does not promise maximum brightness throughout that time.
- Consider a headtorch for hands-free tasks, an aimable torch for directed light, or a lantern for stationary area lighting.
- Aim and place the light carefully, use the lowest setting that does the job, and switch it off when it is no longer needed.
1What the three lighting figures tell you
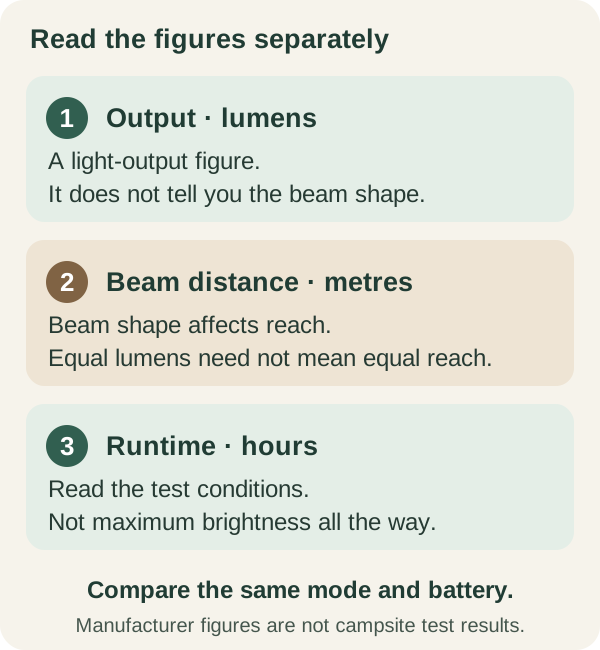
Lumens describe light output. A headline figure tells you how much light is produced under the stated test conditions, not necessarily how much remains through the evening. Check whether it describes initial, sustained or short-duration boost output.
Beam distance is a different measurement. It uses a defined illumination threshold under test conditions. Do not treat it as a promise that every task will be comfortable at that distance.
Check beam shape as well as lumens. Two lights with the same output can spread that light very differently: a broad beam may suit nearby tasks, while a concentrated beam reaches farther into a smaller area.
Runtime needs context. Find out which mode and battery setup the figure describes, and how the test defines the end of the run. A lamp can still be on while producing much less light than it did at the start. Look for an output curve if sustained brightness matters to your task.
2Keep the setting and battery with the number
A useful specification comparison keeps the figures together: this mode, this battery configuration, this output and this runtime. Avoid pairing a maximum-output headline with a longest-runtime headline unless the manufacturer actually assigns both to the same setting.
Do not pair the brightest-output headline with the longest-runtime headline unless both apply to the same mode. A low setting may run for much longer than the setting used to advertise maximum brightness.
Check whether boost is available only briefly and whether the figures apply to white or coloured light. Treat each set of conditions as specific to that lamp, rather than borrowing assumptions from another model.
Use the performance table for the batteries you intend to carry. Disposable cells and a rechargeable pack can give different output or runtime in the same lamp.
3Match the light to the task
For hands-free close tasks, a headtorch with a broad, even beam is a useful starting point. Try it for looking through a bag, checking fittings or moving around your pitch without shining it into someone else’s eyes.
For light you can aim, compare handheld beam options. A spot setting concentrates light, while a flood setting spreads it more widely. Choose around the task instead of treating the longest advertised distance as the best campsite setting.
For stationary area lighting, check whether a lantern can stand, hang or attach securely where you need it. A dimmer helps you use only as much light as the task requires. Illuminate the working area, not every neighbouring pitch.
You do not need to turn those three categories into a shopping list. Use the task distinction to assess the light you already own or the one you are considering.
4Keep unnecessary light off neighbouring pitches
Keep campsite lighting useful and considerate: light the task, limit spill and switch it off when it is no longer needed.
- Give the light a purpose. Decide what needs illuminating before choosing the setting.
- Aim at the task. Position the light downwards where practical and limit spill beyond the area you need.
- Start with the lowest useful level. Increase it if the task needs more, rather than making maximum brightness the default.
- Control the duration. Dim where possible and switch off when the light is no longer needed.
- Consider colour. If you have a choice, try a warmer setting for relaxed evening use and check how it feels to the people sharing the space.
There is no universal campsite lumen number in this guidance. The useful decision is whether your chosen light, setting and placement serve the task without adding unnecessary spill. That is something to check on the pitch, not something the largest number on the packaging can settle.
Read next
Camping After Work: Can One Night Fit Your Plans?
Check whether a one-night campsite stay fits between leaving work and the next day’s commitments, using your own timings and the site’s rules.
First Camping Trip With Children: Preparing Together
Prepare for a first camping trip with children: practise together, invite planning ideas and check the rules for your actual campsite.
Join the conversation
What has worked for you? Share a useful tip, ask a question or tell us about your experience. Keep it friendly and leave out personal contact details.
Comments are reviewed before appearing. Your display name and comment will be public; your email address will not. How we handle your information.